Nest is a Node.js framework used for building highly efficient and scalable server-side applications that also supports TypeScript. The reason for using Nest over other Node.js frameworks is that unlike Express, Nest is opinionated and provides an out-of-the-box architecture for the application which allows developers to create testable, scalable and loosely coupled and easily maintainable applications.
Nest is often referred to as ‘Angular for Backend’, since it is highly inspired by the Angular framework.
Key features of Nest
Clean code, better architecture: Nest provides a great architecture for building server-side applications. It enforces developers to use the best practices and right design patterns.
Easy to learn: It is not difficult to learn and use Nest, especially if you are coming from an Angular background, or if you have used frameworks like Spring and ASP.NET. Nest creators tried to make the learning curve as smooth as possible by not reinventing the wheel. Nest also uses Express or Fastify under the hood.
Default TypeScript support: By default, all features of Nest come with a default TypeScript support. This is a great feature provided by Nest. But if you do not want to use TypeScript, you can easily switch to vanilla JavaScript.
Well maintained documentation: One of the good things about Nest is that it has pretty good documentation. It is well maintained regularly and is enough for anyone to explore different features of Nest.
Powerful CLI: Nest comes with a great CLI (Command Line Interface) that can be used to initialize, develop and maintain the Nest application. It is time saving and embodies best-practice architectural patterns to encourage well-structured apps.
In-built support for different technologies: Nest is not just a framework, it is a platform. It supports so many technologies out-of-the-box, eg. databases like MySql, Postgres, MongoDB etc. GraphQL, REST API, WebSockets, microservices and a lot more.
Building Blocks of Nest
There are several components that are essential for building a Nest application. But the most important building blocks are:
– Controllers
– Providers
– Modules
Let’s discuss them one-by-one:
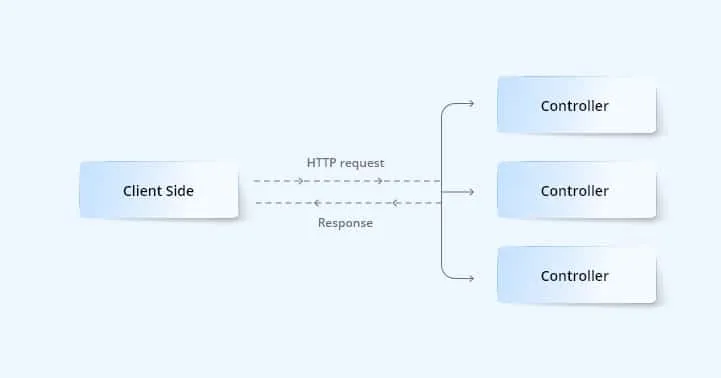
Controllers: In any application, there must be at least one entry point to interact with the application. This is where controllers come into the picture. At a high level, controllers receive the request from a client and give a response back to the client.
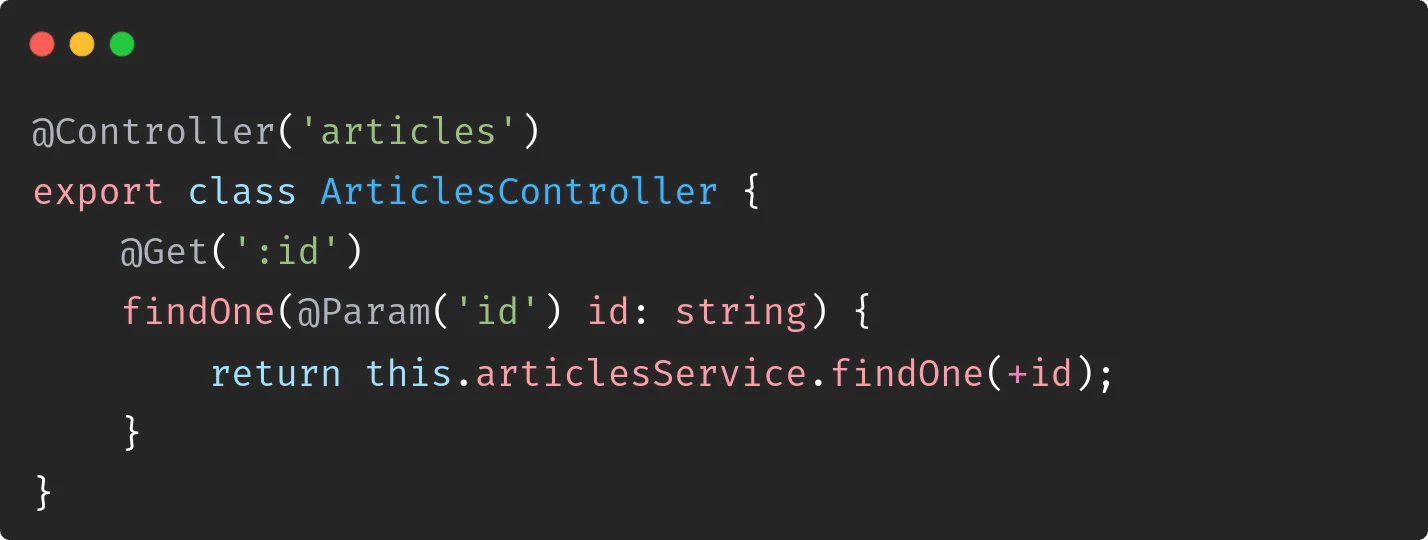
To create a basic controller in Nest, @Controller() decorator is used. It can take an optional parameter which is used to specify the path prefix for a route. Using a path prefix is useful for grouping a set of related routes and minimizing the repetitive code.
In the above example, @Get() decorator is used to tell Nest to create a handler for a specific endpoint for HTTP requests. The endpoint corresponds to the HTTP request method (GET) and the route path. The route path is determined by the prefix (‘articles’ in our case) declared for the controller and any path specified in the decorator method. For the above example, the request will look like this: GET /articles/:id
Providers: The provider in Nest can be in the form of a service, repository, factory and so on. In simple words, a provider is an instruction for the dependency injection system of Nest on how to obtain value for a dependency. It might be a class decorated with @Injectable() decorator, a factory or simply just a value bound to the container.
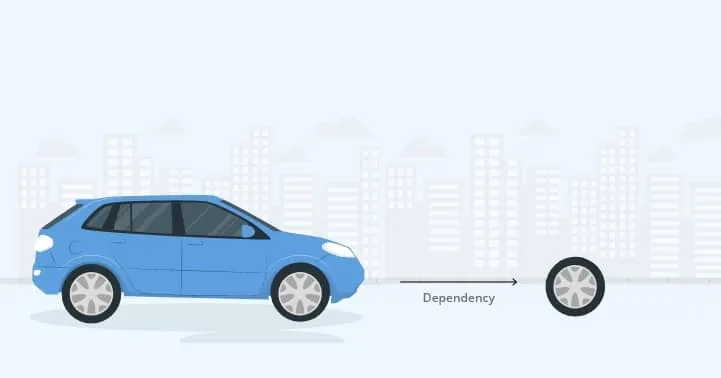
A car needs a wheel to function, so here the wheel is a dependency to the car. Similarly, a modal class needs an instance of a database to function, so here, database is a dependency to the modal.
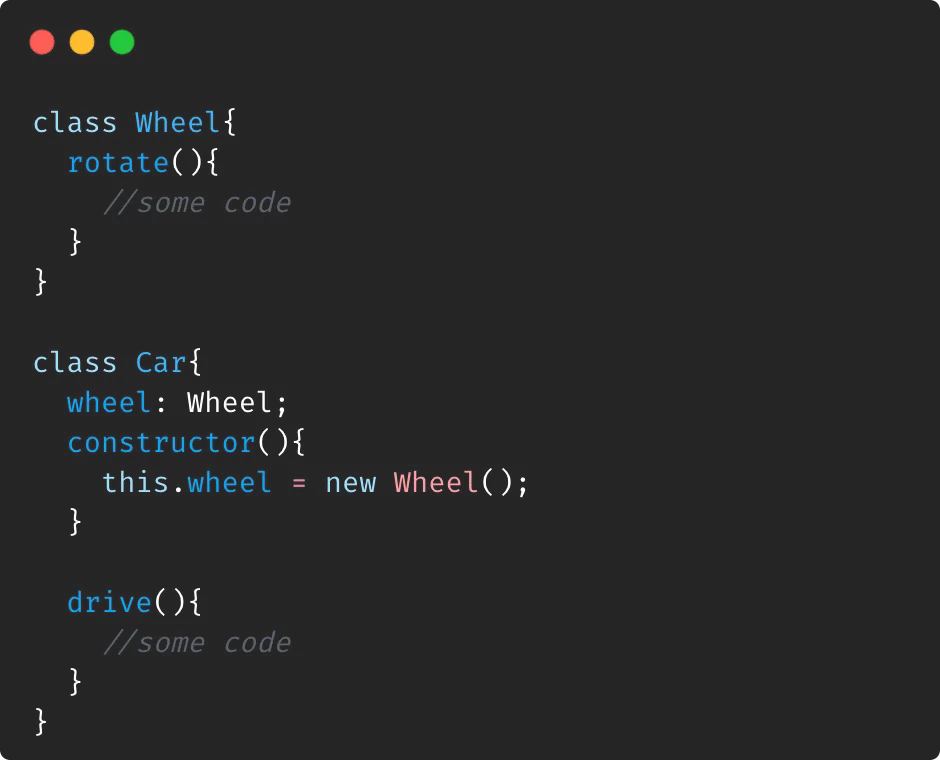
Now, that the meaning of word dependency is clear, let’s take a look at an example:
There are a couple of issues with the above implementation of the Car class:
– Since Car is responsible for creating a new wheel, it is not easily testable.
– There is violation of Single Responsibility Principle .
– Wheel object is not reusable anymore.
– Since the creation of Wheel is coupled with Car, using a different instance of Wheel is difficult.
Let’s modify the above implementation with an intent to solve above issues:
Now, instead of hardcoding the creation of Wheel instance inside the Car class, we just specified that Wheel is a dependency to the Car class, and created the instance of Wheel at run time. This is what dependency injection is.
In other words, dependency injection means delegating the instantiation of dependency to the run time system insead hard coding it inside the class that needs that dependency.
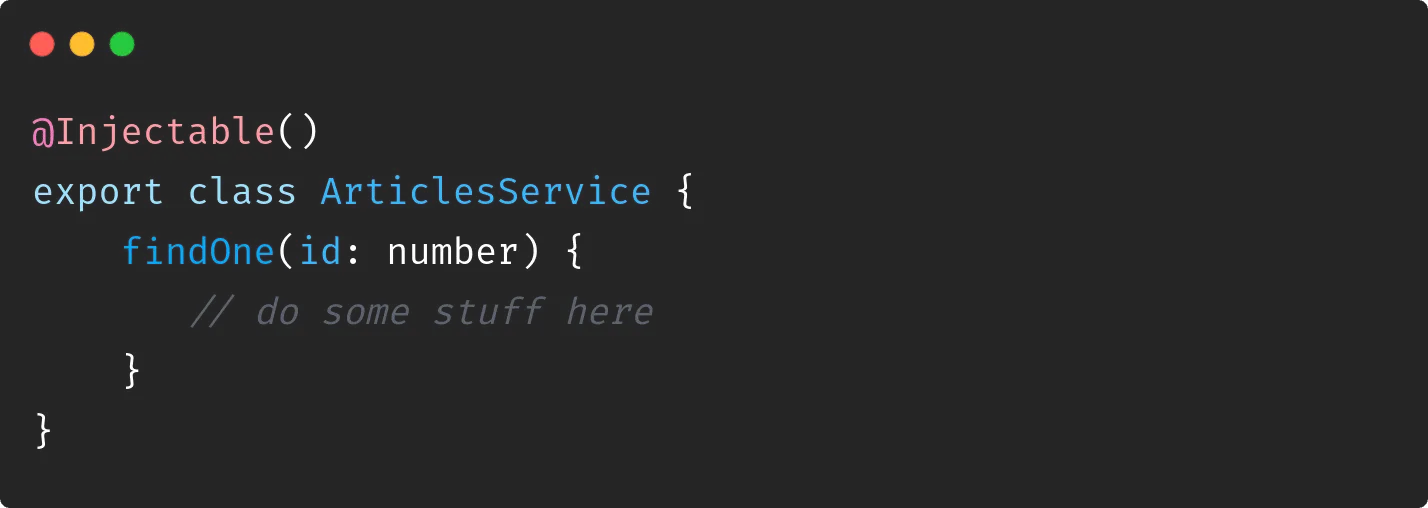
Let’s see how this works in Nest. Below is example of a simple service class that is a dependency to the ArticlesController created before.
@Injectable() decorator is specified above the service class to tell Nest IOC container that this class will be used as a dependency and Nest IOC need to create an instance of this class at the run time.
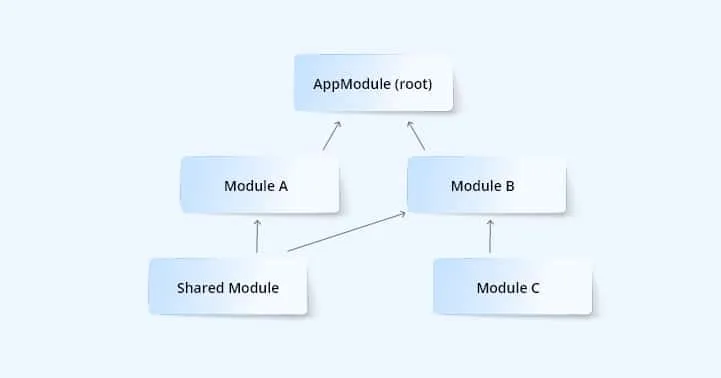
Modules: Each feature in a Nest application can be treated as a separate entity with the help of Modules. A module is a class annotated with @Module() decorator. Nest uses the metadata provided by this decorator to organize the application structure.
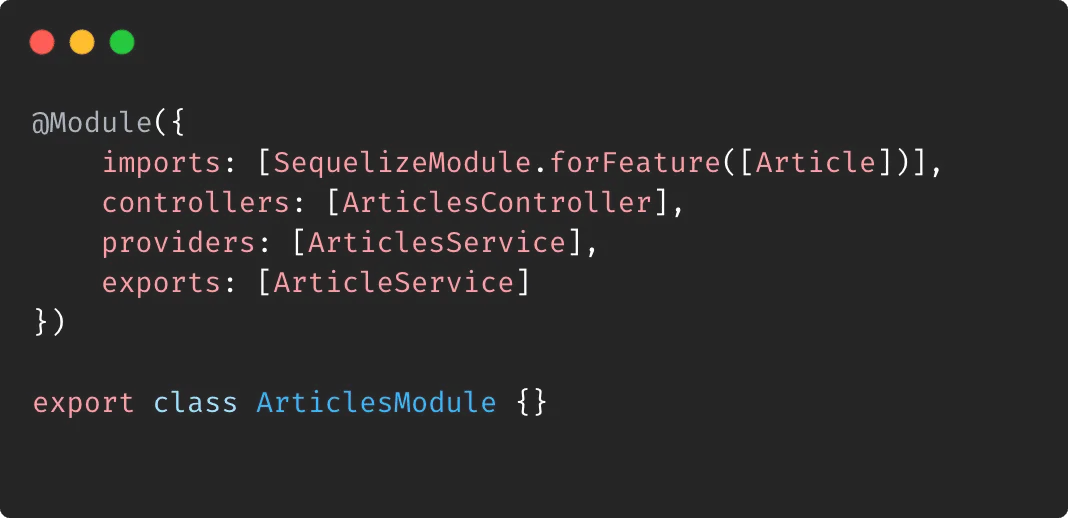
An example of a Nest module is given below:
The properties of @Module() decorator are described as follows:
– Imports: It is a list of imported modules that export the providers that are required in this module.
– Controllers: It is a list of controllers that need to be instantiated in this module.
– Providers: It is a list of the providers that need to be instantiated by the Nest Injection system that may be shared at least across this module.
– Exports: It is a list of subset of providers that should be available to other modules as well.
The powerful CLI of Nest
The CLI provided by Nest is a great feature that helps from initializing a starter Nest application to creating complete REST API or GraphQL, microservices etc. In order to use Nest CLI, first it needs to be installed using the following command:
$ npm install -g @nestjs/cli
Now you can use the Nest CLI from the terminal as well. A general form of syntax used by Nest CLI is given below:
nest commandOrAlias requiredArg [optionalArg] [options]
For example, if you want to generate a crud for users, you can run following command in the terminal:
nest g resource user
And then follow the subsequent steps given by the CLI.
Swagger
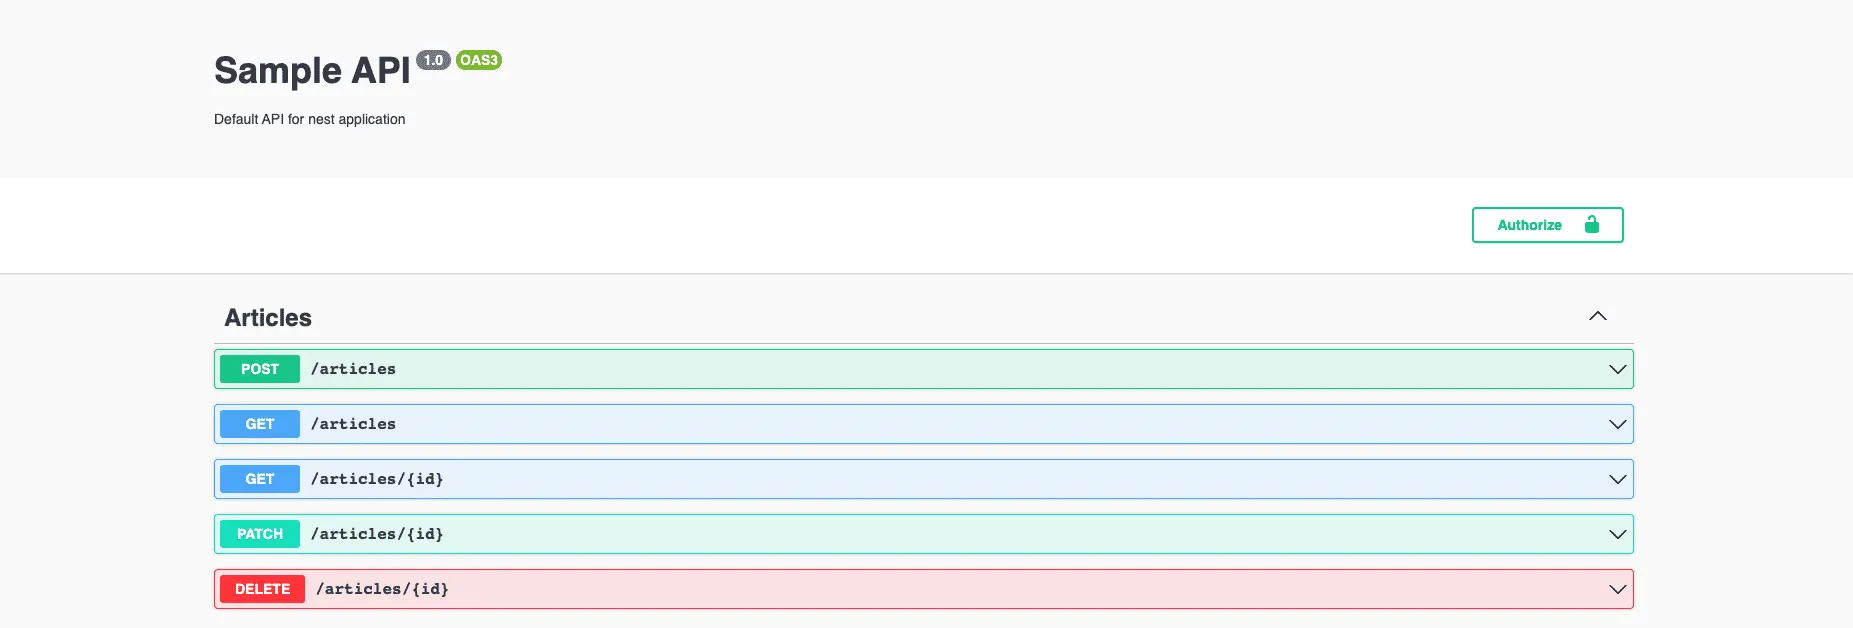
A good API documentation is important for clients to use our APIs effectively. Nest provides a dedicated module to create OpenAPI compliant documentation.
The SwaggerModule searches for all @Body(), @Query(), and @Param() decorators in route handlers to generate the API document. It also creates corresponding model definitions by taking advantage of reflection.
Conclusion
Nest gives developers a great head start. It encourages and enforces excellent structure for web applications. It helps your team organize work and follow best practices.
Key features of Nest include its ability to control smart home devices, such as thermostats, cameras, and doorbells, remotely through a mobile app. It offers intelligent algorithms for energy-saving and home security functionalities, along with seamless integration with other Google ecosystem products. Additionally, Nest provides real-time alerts and notifications for home monitoring and automation.
The CLI (Command Line Interface) of Nest is powerful due to its ability to generate modules, controllers, and services with a simple command. It automates repetitive tasks, enforces project structure consistency, and integrates seamlessly with TypeScript, making development with Nest.js efficient and scalable.
The building blocks of Nest include its intuitive user interface, which allows users to easily control and monitor their smart home devices. It incorporates advanced machine learning algorithms for predictive behavior analysis and personalized automation. Additionally, Nest offers robust security features, such as encrypted communication and multi-factor authentication, to ensure the protection of users’ data and privacy.
Swagger is a framework for designing, building, and documenting APIs. It provides tools for developers to define API endpoints, request/response formats, authentication methods, and more using OpenAPI Specification (formerly Swagger Specification). Swagger simplifies API development by offering a standardized way to create and communicate API details, fostering collaboration among teams and improving API usability and adoption.
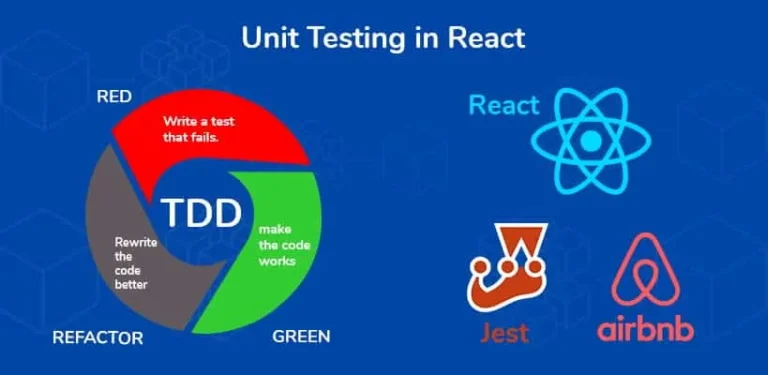
Test Driven Development (TDD) is a programming practice which enables developers to write code only if an automated test has failed thereby avoiding duplication of the code.
Vue.js is a progressive JavaScript framework that is used to build the user interface of modern applications without using a lot of resources. Vue.js mainly focus on the view layer, which enables developers to integrate it into the existing projects without any hassle. Vue.js is a perfect choice for building single-page applications (SPA).
If you are a developer working in a team, then you must realize how difficult and frustrating it becomes when it comes to file sharing. No matter how hard you try for effective collaboration within the team but the fact is that the things become chaotic when there is no version control system.