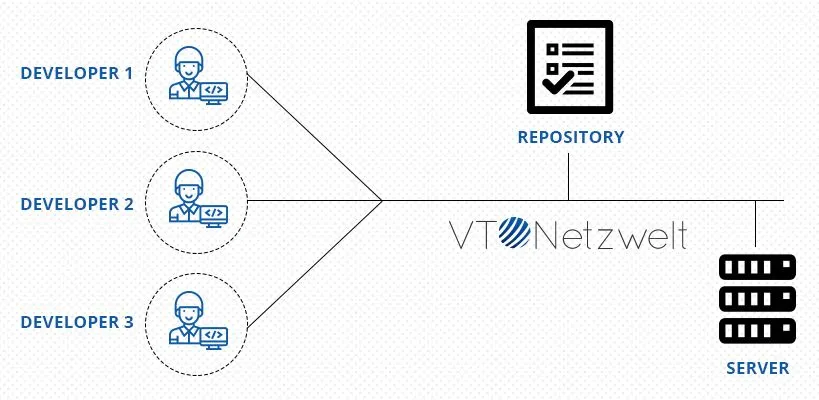
If you are a developer working in a team, then you must realize how difficult and frustrating it becomes when it comes to file sharing.
No matter how hard you try for effective collaboration within the team but the fact is that the things become chaotic when there is no version control system.
Common issues faced by developers include overwriting files, lost files, etc. Even though if you are having a common repo, if one team member forgets to get the latest files, he can destroy things with his/her latest additions.
To avoid all these scenarios, we need an excellent version control system setup.
Version Control, also known as Source Control Management is an extraordinary method to take care of the file-sharing issue.
The main aim of the version control system is to keep a primary repo for all the files. Any member of the team can check out files, roll out improvements and afterward commit them back. The Version Control System keeps a record of as who has changed the files, when they were changed, and what is different about them from the previous state of the repo.
It additionally requests that you compose a little note about the change you have made in the file so that everybody knows what you did and why. You can also rollback to any previous version of the file.
On the off chance, if you and someone else is working locally on the same file at the same time, the main repository will create a new up-to-date file by merging both sets of changes. The Version Control System also highlights any conflicts that may arise during the merge process.
As now you have an idea about Version Control, the next step is to choose a version control system. There are plenty of options available in the market like SVN, Mercurial, Git, Bazaar
Any of these systems can be a good solution for you depending on your needs but here we will be discussing Git. Git has gained a lot of popularity thanks to GitHub and a strong Linux community.
We are ourselves using Git in our organization for quite a long time now and have really benefitted from it when it comes to the time taken for the delivery and the developer’s satisfaction.
Git is an open-source distributed Version Control System. Distributed means that every user have a complete copy of the main repository in his local machine.
Git was created by Linus Torvalds for Linux Kernel Development.
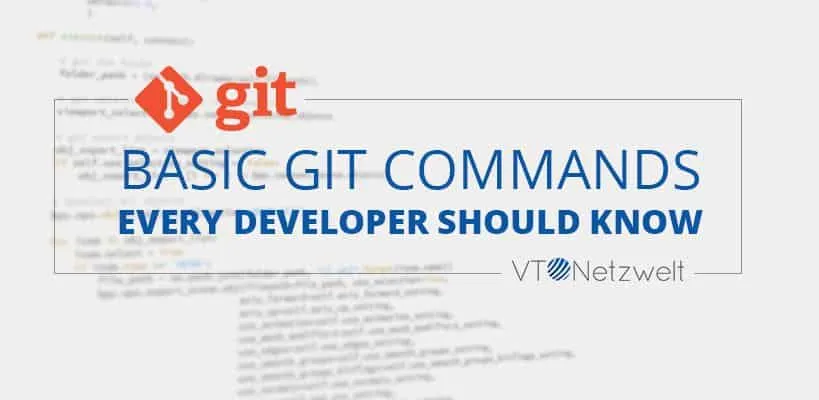
If you are looking to start with Git in your projects, then you need to know a handful of Git commands.
These Git commands are most frequently used by developers. These commands need to be run on a command-line interface (CLI) tool. However, Git also has several GUI clients that you can use.
The first step after installing Git is to configure it. For the basic configuration, there are only 2 commands used. One command is used to register the user’s name and the second command for his email.

After Git configuration, the next step is to initialize a Git Repository or repo. To initialize a git repository for new or an existing project, navigate to the folder which you want to use as Git project folder and run the following command –

After running this command, Git will start tracking all the changes you make in that particular folder. The command has actually created “.git” hidden folder in our directory to maintain and handle any type of changes.
You can create a copy of a remote repo on your local machine by cloning it. First, navigate to the folder where you want to clone the repo and run the following command –

It will download the repo with the folder named “your-online-repo”.

Check the status of the current repository with the following command –
There are three states in which a file can reside in Git –
Type the following command to push your files to the staging area –
The command will add index.html file to the staging environment.
You can also use –
It will move the whole working directory to the staging environment.
You can save the current snapshot of the staging area by committing it using the following command –
Note – It is required to add a commit message that describes the changes you have made.
To push all your local changes to a remote repo, first, you need to create a connection with that repo. For example – if you are creating a connection with an online server such as GitHub, you can use the following command –
After creating the connection, use the following command to push local files to the remote server –
The word origin stands for remote repo and master is your local repo.
push – push your changes to the remote server
origin – remote server origin
master – master branch
Suppose you want to see the code of other developers in your local repo. To do so, we use the following command –
The command will pull all the changes from the remote repo to your local repo. Running this command only is enough for updating the local repo.
If someone else is also working on the same project and you want to bring the changes others have made in the project, then you don’t need to clone the repo again, just type the following command –
The command gathers any commits from the target branch to your local repo. However, the command does not merge them with your local repo.
To merge the changes from the remote repo to your local repo, type the following command –
Use the following command to list down all the branches
Working with Git definitely requires a learning curve but it has become mandatory as app development is impossible without a version control system.
There are more commands which can be used so if you feel we have missed some commands do let us know by commenting below.
Version control is a system that helps manage changes to source code over time, allowing multiple developers to collaborate efficiently. It tracks revisions, enabling the restoration of previous versions and the management of concurrent work. Tools like Git provide essential commands to facilitate version control, making it a critical component of modern software development.
The most commonly used Git commands include git init to initialize a repository, git clone to copy an existing repository, git add to stage changes, git commit to save changes, git push to upload local changes to a remote repository, and git pull to fetch and merge changes from a remote repository. These commands form the foundation of efficient version control in software development.
Using a version control system offers numerous benefits, including tracking changes to code over time, facilitating collaboration among multiple developers, and enabling the restoration of previous versions if needed. It helps manage code conflicts, supports parallel development, and ensures a structured workflow, significantly improving project management and code quality.
Git facilitates collaboration by allowing multiple developers to work on the same codebase concurrently. It enables branching for feature development, merging changes, and resolving conflicts efficiently.

Are You Prepared for Digital Transformation?
Web Development Blog
It’s 2026, and data is everywhere—powering apps, websites, and even the gadgets we use daily. Behind the scenes, databases are working hard to keep everything running smoothly, whether it’s helping your favorite streaming service suggest what to watch next or making sure your online orders arrive on time.

Web Development Blog
Indexing is a robust database method that can significantly enhance query performance and increase overall system efficiency. Indexes allow quick data retrieval, sorting, and filtering processes by organizing data into organized data structures. This blog will discuss the idea of indexing, its advantages, different types of indexes, factors to take into account when using indexes […]
Web Development Blog
Test Driven Development (TDD) is a programming practice which enables developers to write code only if an automated test has failed thereby avoiding duplication of the code.