Summary of the Article
Have a project in mind?
Schedule a CallUnit Testing React Application using Jest Testing Framework (Part-2)

Summary of the Article
Jest is a JavaScript testing framework that allows developers to run tests on JavaScript and TypeScript code and can be easily integrated with React JS.
When you use create-react-app for creating a react project, it has default support for jest and React Testing Library (RTL). This means that we do not have to install them manually.
Now, what is a React Testing Library (RTL) ?
React Testing Library is a testing utility that helps you test your React components in a way that simulates how users would interact with your application. It is built on top of the DOM Testing Library, which is a simple and lightweight library for testing DOM nodes.
It provides a set of utilities for rendering and interacting with React components in a testing environment, as well as a variety of methods for asserting the expected results of tests.
Some of the key features of React Testing Library include:
-
Render methods: React Testing Library provides several methods for rendering React components in a testing environment. These methods include render, renderToString, and renderToStaticMarkup.
-
Queries: React Testing Library provides a set of query methods that allow you to find elements in the rendered output of a component. These methods include getByLabelText, getByText, getByRole, and getByTestId.
-
Async Utilities: React Testing Library provides a variety of utilities for testing asynchronous code, including waitFor, which allows you to wait for a certain condition to be met before continuing with the test.
-
Interactions: React Testing Library provides several methods for simulating user interactions with the elements of a React component. These methods include fireEvent.click, fireEvent.change, and fireEvent.submit.
-
Matchers: React Testing Library provides a set of matchers that allow you to make assertions about the expected results of tests. These matchers include toBeInTheDocument, toHaveAttribute, toHaveClass, and toHaveStyle.
Basic component testing with react testing library
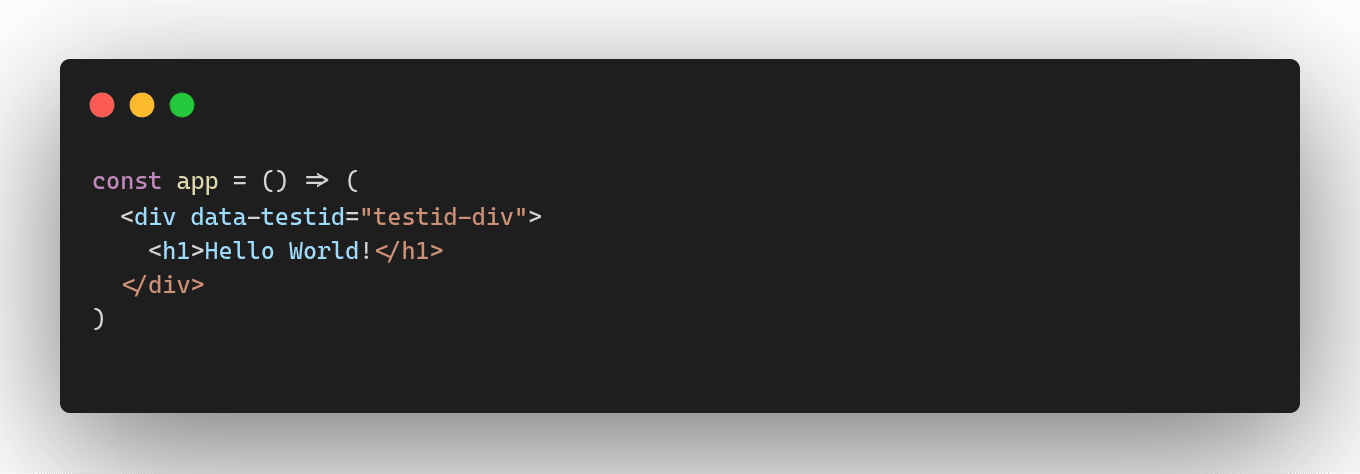
Assuming we have a simple component ‘app’
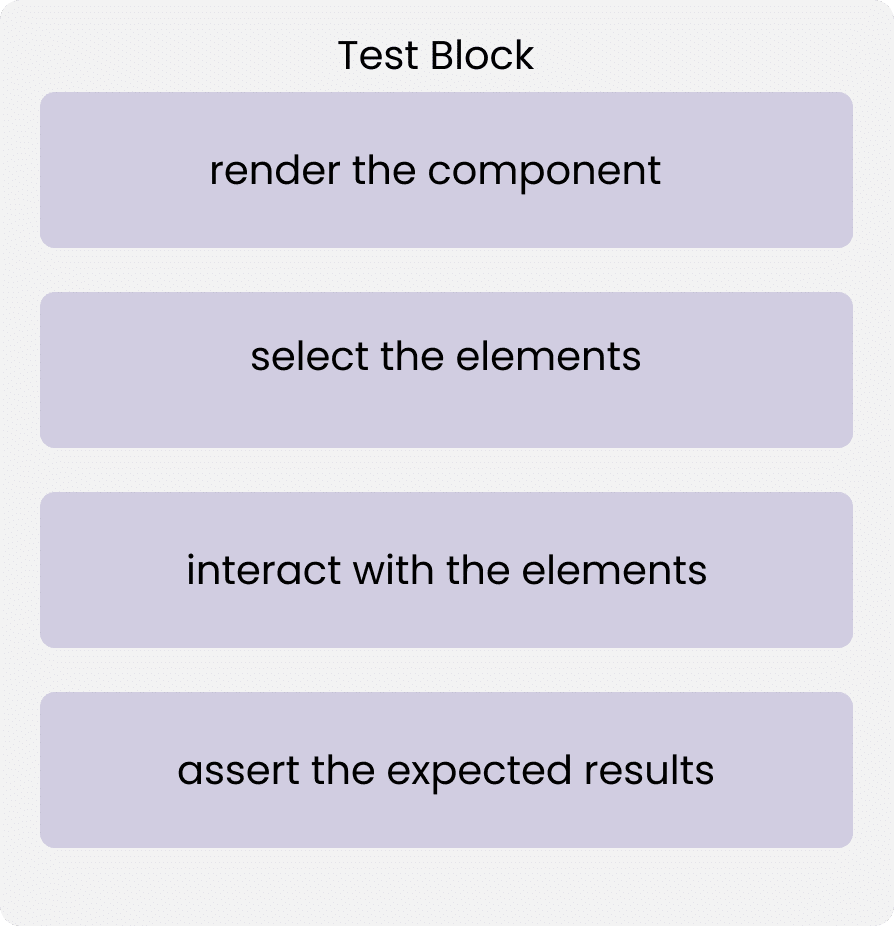
Before writing an actual unit test, let’s understand the general structure of a test block:
-
Render the component: The render method is a function provided by the React Testing Library that allows you to render a React component into a virtual DOM. This virtual DOM is then used to test the behavior of the component.
-
Select the elements: After you have rendered your React component(s), React Testing Library offers you different search functions to grab elements. These elements are then used for assertions or for user interactions.
-
Interact with the elements: React Testing Library provides several methods to simulate user interactions with the elements of a React component. These methods allow you to test the behavior of the component in response to user actions such as clicking, typing, or hovering.
-
Assert the expected results: React Testing Library provides a variety of methods for asserting that the expected results of your tests have been met. These methods allow you to check that the rendered component has the correct properties, values, and behavior.
Let’s write unit test for the app component:
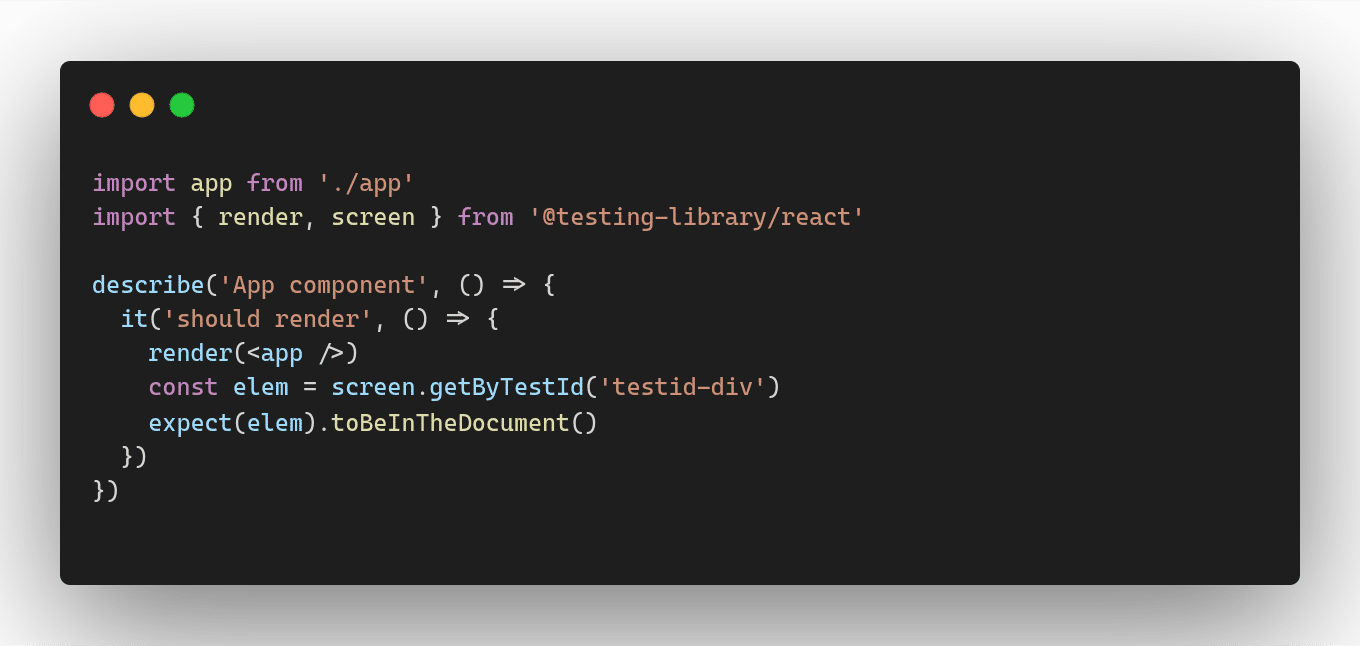
In this example, it checks that the component renders without errors by finding an element with a data-testid attribute of “testid-div” and asserting that it is in the document using the toBeInTheDocument matcher. The test ensures that the App component can be successfully rendered and that a specific element is present in the rendered output.
Running unit tests using the below command will produce the output described below in the screenshot.


The framework outputs various information to the console:
-
The test suite name and status (passed, failed, or skipped).
-
The test case name and status (passed, failed, or skipped).
-
The number of test suites, test cases, and assertions executed.
-
The time it took to run the tests.
So far, we’ve only tested whether an element is rendered (or not) in a React component with getBy. What about actual user interactions? If a user clicks on a button, the component may re-render, and the new value should be displayed (or used somewhere).
We can use RTL’s fireEvent functions to simulate interactions of an end user. Let’s see how this works for our component:
Let’s make some changes to the component:
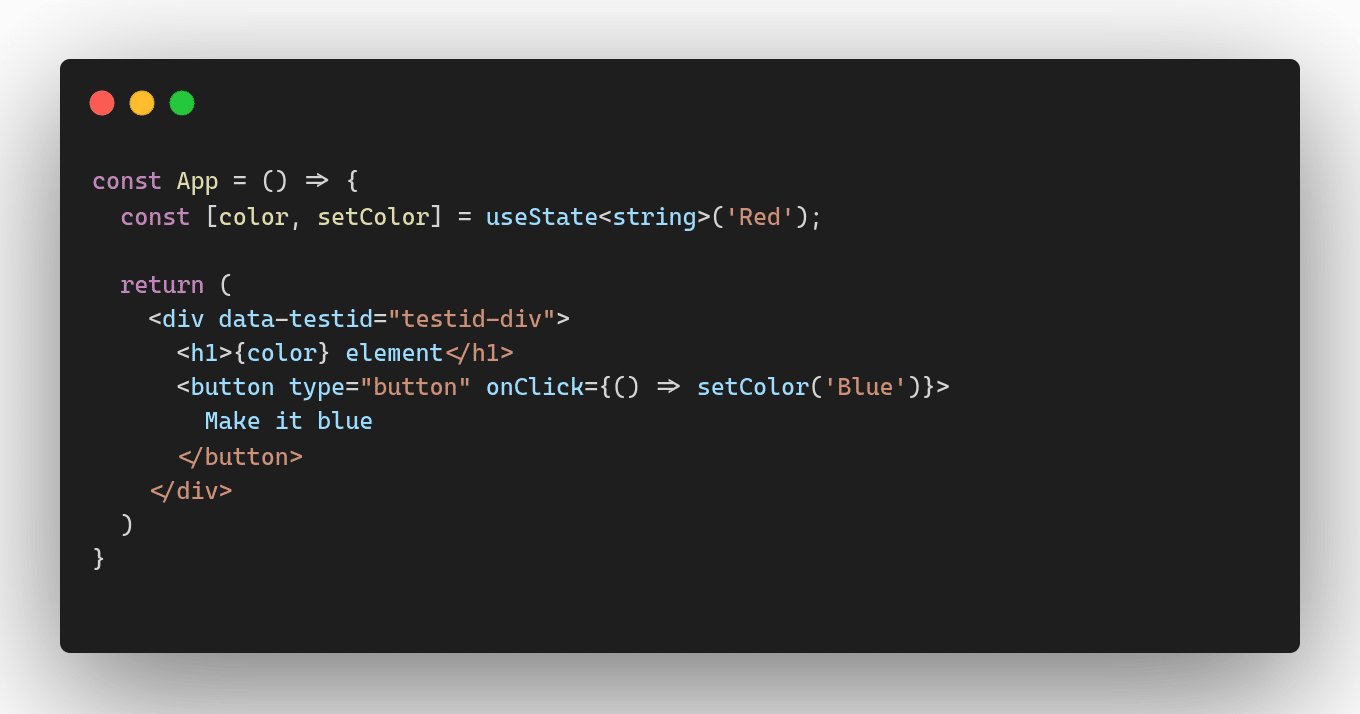
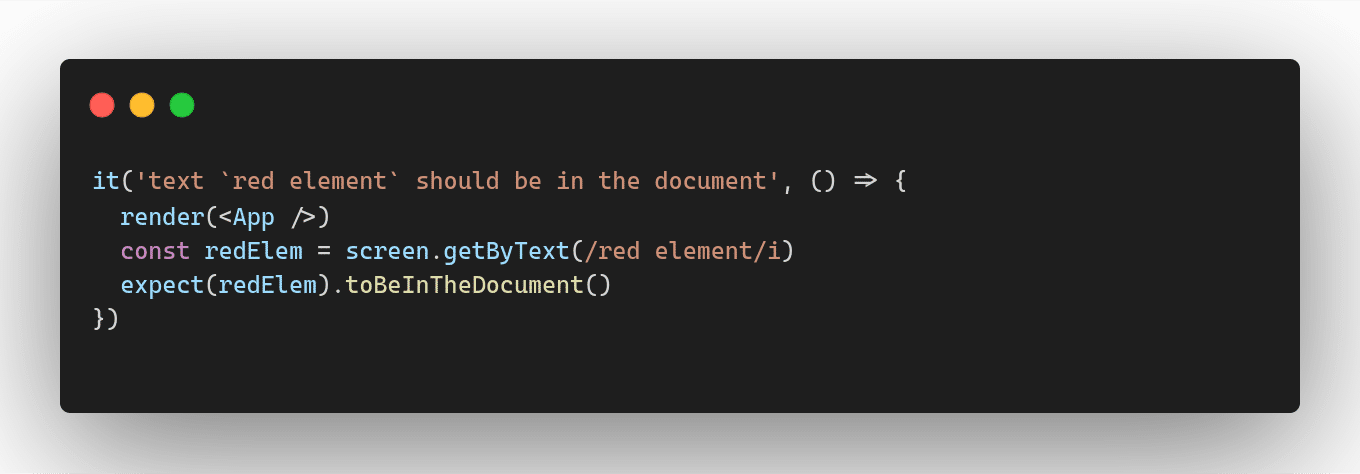
In this example, the useState hook is used to create a new state variable called color with a default value of “Red”. The setColor function is used to update the color state variable later on. Also, a simple button element has been added, the text “Red element” will be replaced by “Blue element” in the document on clicking that button.
Unit test for the default state has been written as:
Now we know the output of the click event on the button. Lets test this user’s interaction using the fireEvent library.
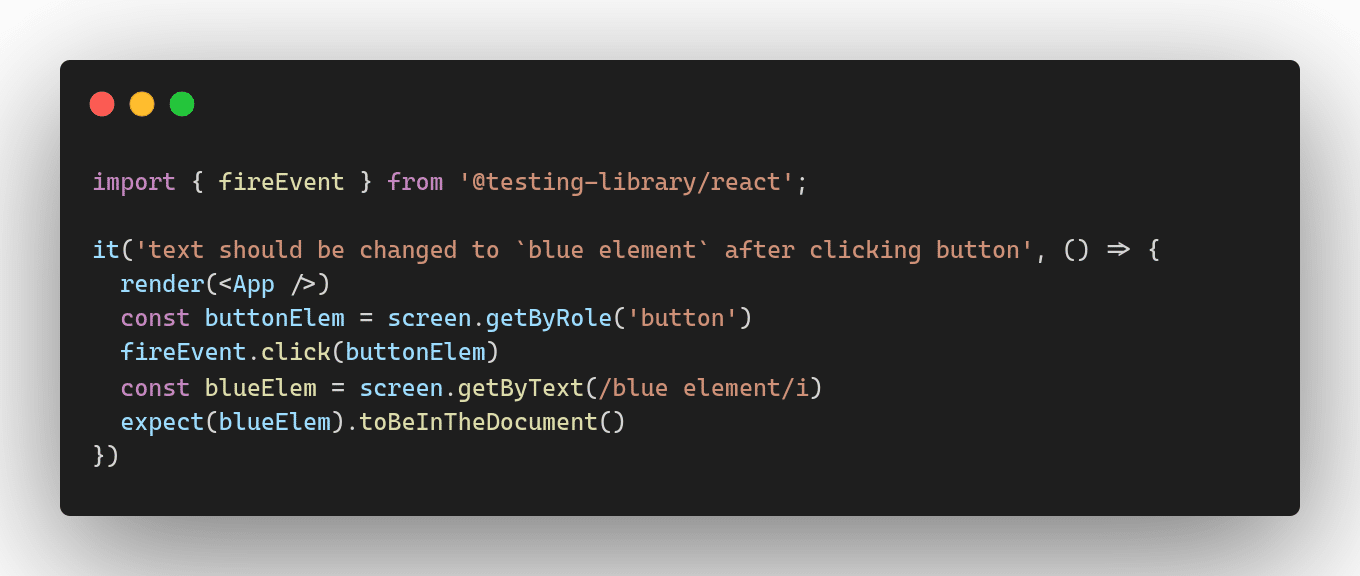
In this example, it gets the button element from the rendered output using the getByRole query method, and simulates a click on it using the fireEvent.click method and checks that the updated text (“blue element”) is present in the rendered output of the App component. It does this by using the getByText query method with a regular expression to match the text “blue element”.
Finally, it asserts that the element with the updated text is present in the document using the toBeInTheDocument matcher.
Let’s extend our simple App component with the following feature:
After its initial render, the App component fetches a user from an API. The API returns a JavaScript promise which immediately resolves with a user object, and the component stores the user from the promise in the component’s state.
Now the element fetched using the getBy method would not be readily available and it will result in a test failure. That’s where another query method findBy comes into picture. The findBy method in React Testing Library is similar to the getBy method, but it waits for an element to appear in the DOM asynchronously.
However, if an element is not immediately available when the findBy method is called, the test will wait for a certain amount of time (by default, up to 5 seconds) for the element to appear before throwing an error.
The findBy method returns a Promise that resolves to the element once it is found. You can use the await keyword to wait for the Promise to resolve before continuing with your tests.
Let’s have a look at simple example:
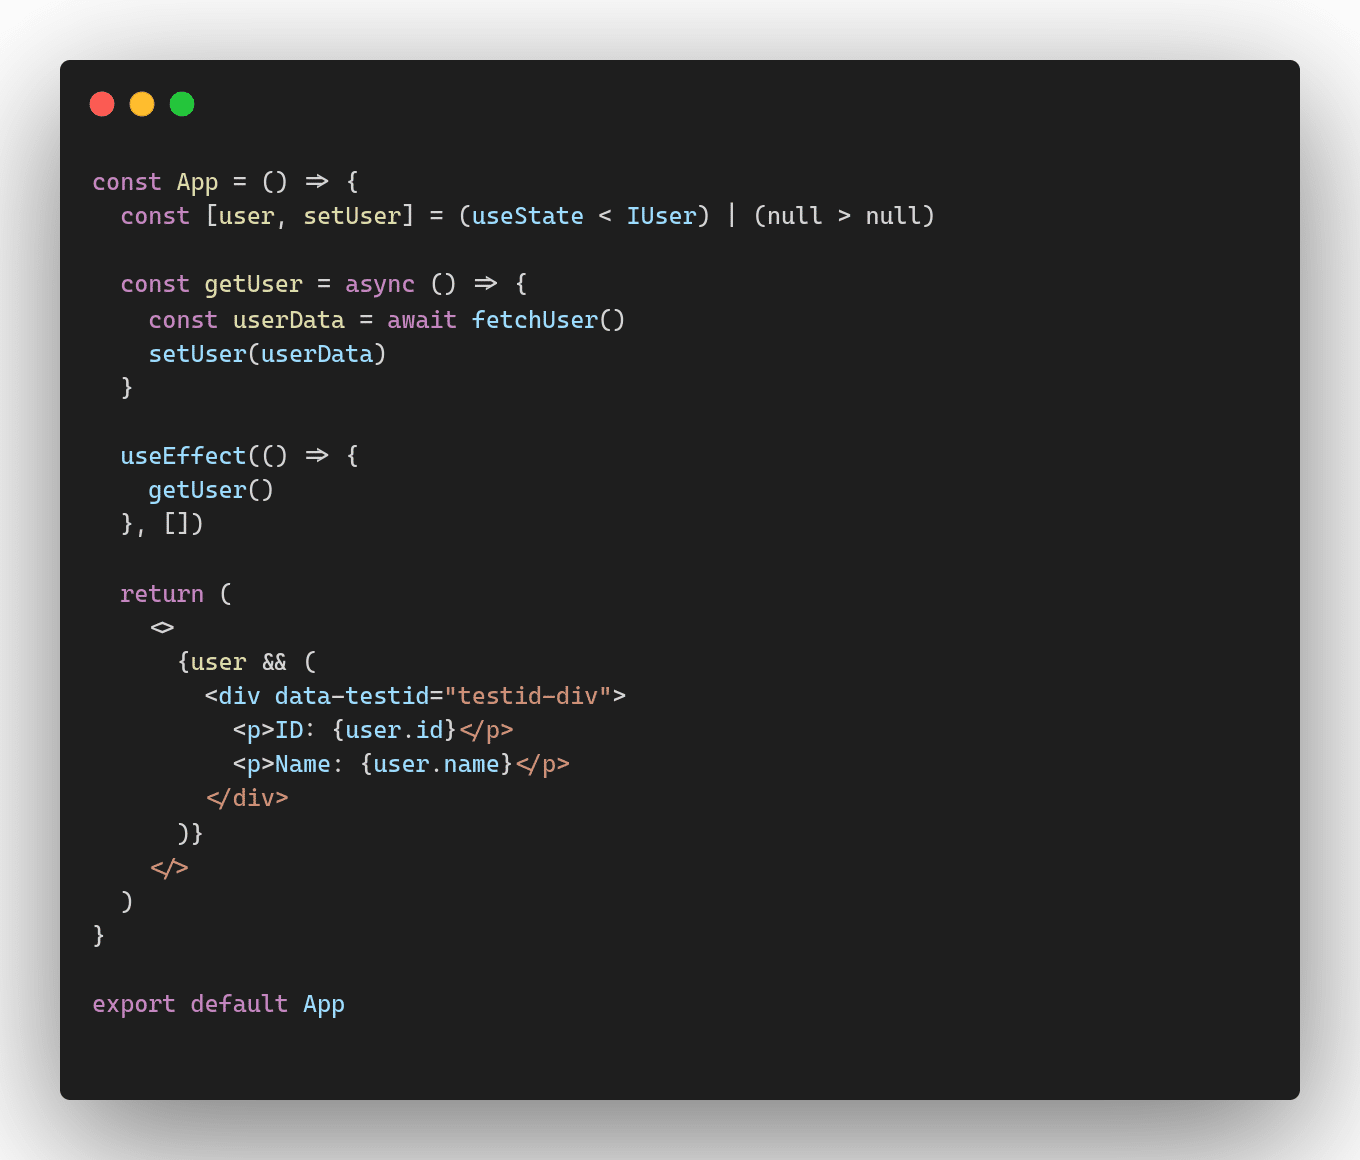
In this example, the component defines a state variable called user using the useState hook, which is initialized as null. It also defines an async function called getUser which fetches user data using the fetchUser function and updates the user state variable with the fetched data.
The component also uses the useEffect hook to call the getUser function when the component is mounted. This ensures that the user data is fetched and rendered as soon as the component is loaded.
For instance, suppose we have fetchUser function like this:

It will simply return a user promise object with properties name and id having values “John” and 1. This component can be easily tested using the query method findByText. Let’s have a look:
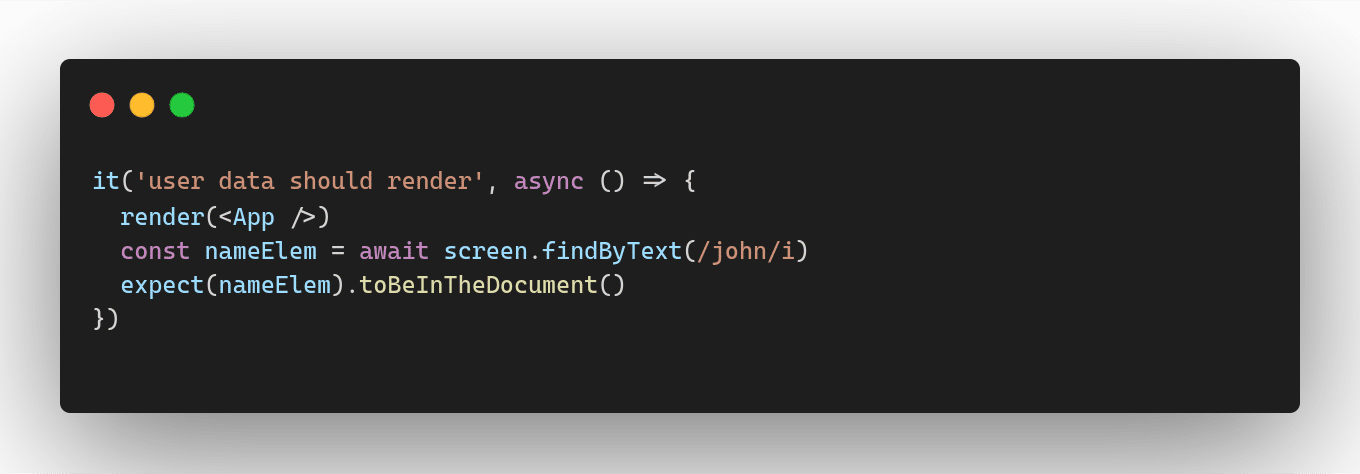
The findByText method returns a Promise that resolves to the matching element once it is found. The ‘await’ keyword is used to wait for the Promise to resolve before making an assertion on the returned element.
Finally, the test case uses the expect function to assert that the returned nameElem is in the document using the toBeInTheDocument matcher.
In the example provided earlier, the fetchUser method returns hard-coded data. However, in real-world scenarios, data may need to be fetched from a server using an API call. When writing unit tests for such scenarios, it is generally not desirable to make actual API calls, as it could lead to inconsistencies or failures due to network issues or changes in the server’s response.
Instead, developers can use a technique called mocking to simulate the server response with test data that closely resembles the expected data. This allows developers to write unit tests that check whether their code is handling the server response as expected, without the need for network access.
Mocking can be implemented in various ways, such as using a mocking library like Jest, or manually creating mock functions that simulate the behavior of the server response. Regardless of the approach, it is important to ensure that the mock data closely matches the structure and content of the actual server response, so that the tests are reliable and accurate.
By using mocking, developers can write unit tests for their components that verify the expected behavior without relying on network access, making the tests more efficient, reliable, and independent of external factors
What is Mocking?
Mocking means creating a fake version of an external or internal service that can stand in for the real one, helping your tests run more quickly.
-
Mock functions (using jest.fn() and jest.spyOn())
-
Mock modules
-
Mock partials
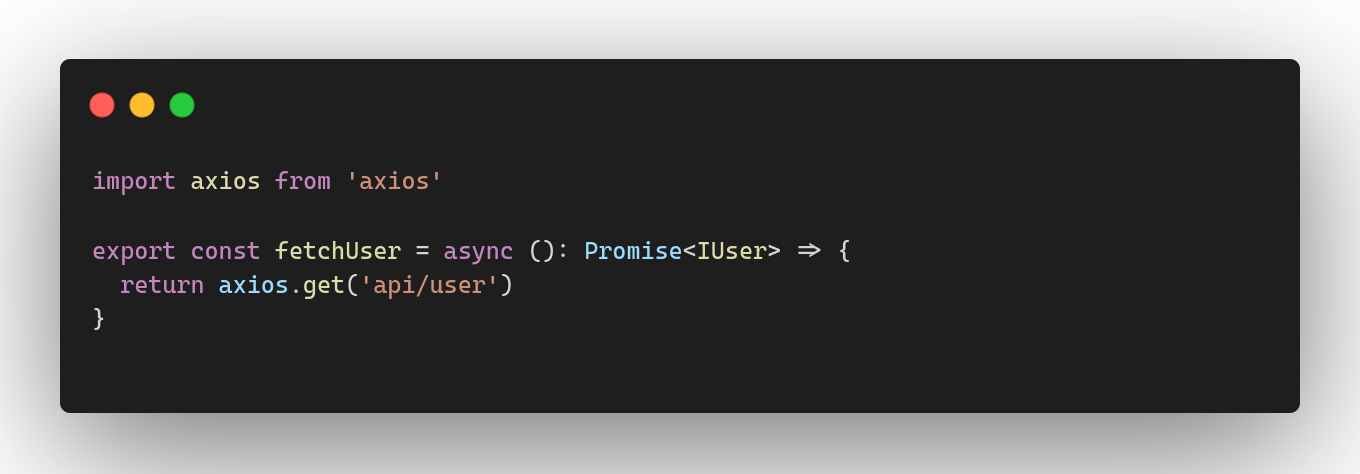
Let’s modify the previous method fetchUser example and add axios into it.
Filename: server/fetch-user.ts
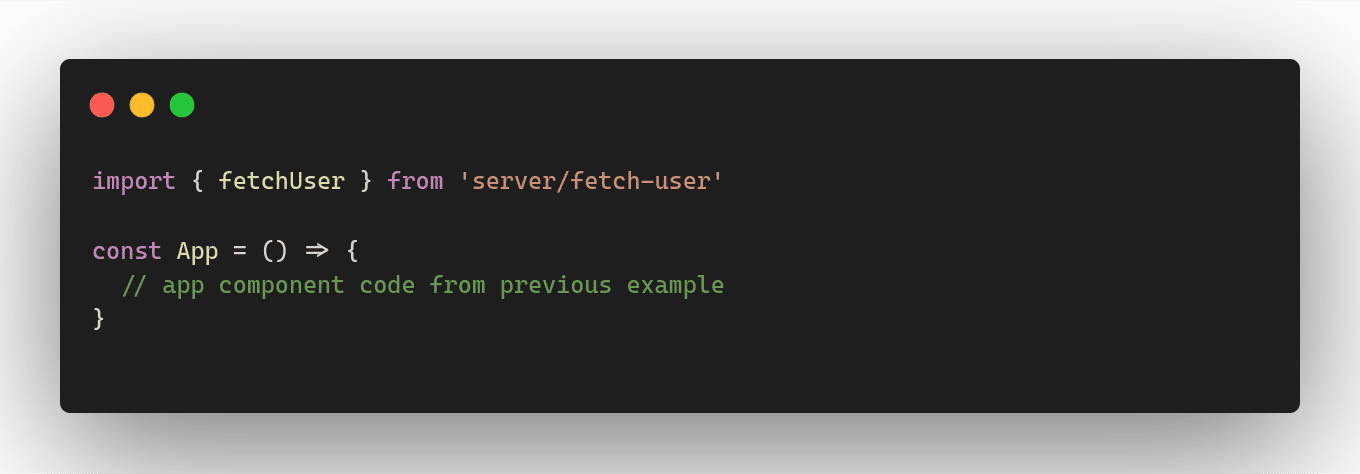
Next, import the fetchUser method into the App component.
In the previous example, we saw that axios was used to request data from the server. However, in unit testing, it is essential to isolate the component being tested from any external dependencies.
We need to mock fetchUser’s implementation inside our test code for the App component.
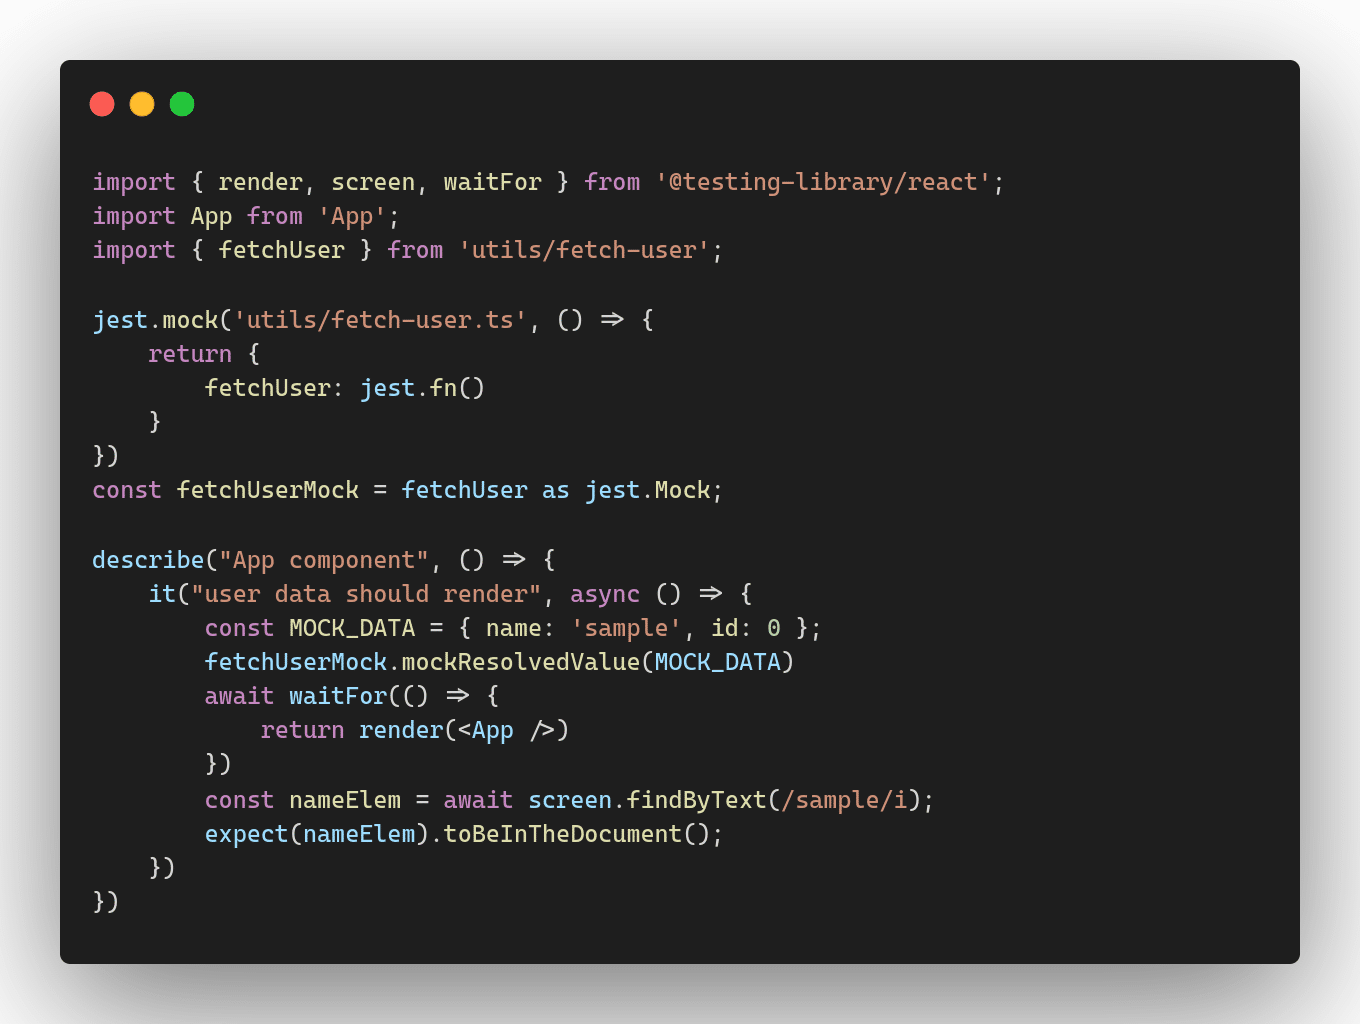
In this example, the test uses jest.mock to mock the fetchUser function and provide a mock implementation that returns a mocked data object.
Inside the test case, the fetchUserMock is set up to return the MOCK_DATA object when it is called. After the component is rendered, the screen.findByText function is used to find the element containing the text “sample” (name inside the MOCK_DATA object), and the expect function is used to assert that the element is in the document.
If we run the test command with -–coverage flag, one can see the covered/uncovered lines in the code. Refer to this screenshot:

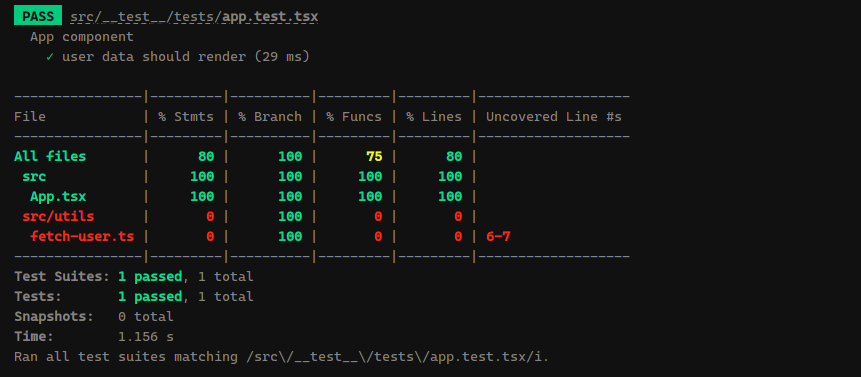
In this screenshot, a coverage report is being displayed in the console in a tabular format. The report provides information about the lines, statements, functions, and branches that are covered by the unit tests, as well as the lines that are not covered.
Conclusion
In Part 1 of our exploration into unit testing, we established its foundational importance, emphasizing that it’s not just a tool, but a crucial part of the development mindset for high-quality, maintainable code.
Building on this in Part 2, we explored practical applications using Jest and React Testing Library (RTL) in ReactJS. We discussed their integration in create-react-app, focusing on simulating user interactions and testing asynchronous components. We covered test structure, mocking techniques for API testing, and the use of Jest’s –coverage for test coverage analysis, providing a practical guide to advanced unit testing in React.
This journey from understanding the principles in Part 1 to appreciating the practical advantages in Part 2 underscores unit testing’s indispensable role in enhancing software quality and robustness.
Frequently Asked Questions
what is a React Testing Library (RTL) ?
React Testing Library is a testing utility that helps you test your React components in a way that simulates how users would interact with your application. It is built on top of the DOM Testing Library, which is a simple and lightweight library for testing DOM nodes.
What is Mocking?